Once your Google Virtual Tour has been published, it will be available via Google Search and Google Maps… but you can also embed it into your website.
This very simple process is outlined below. Most website owners can probably do this themselves (particularly if your site is a WordPress site), but if you are having trouble, simply pass the link to this post onto your web developer.
Step 1 – Find your listing on Google Maps
First go to Google Maps, search for your business. It is IMPORTANT that you use Google Maps, because accessing the Tour direct form Google Search does not offer the share/embed capabilities that are provided by Google Maps.
Then click on one of the 360° Panosphere links in the left column (these are associated with the “Storefront” and “Inside Starting Point” views of your tour) to view your Virtual Tour.

Step 2 – Select the “View” you Want
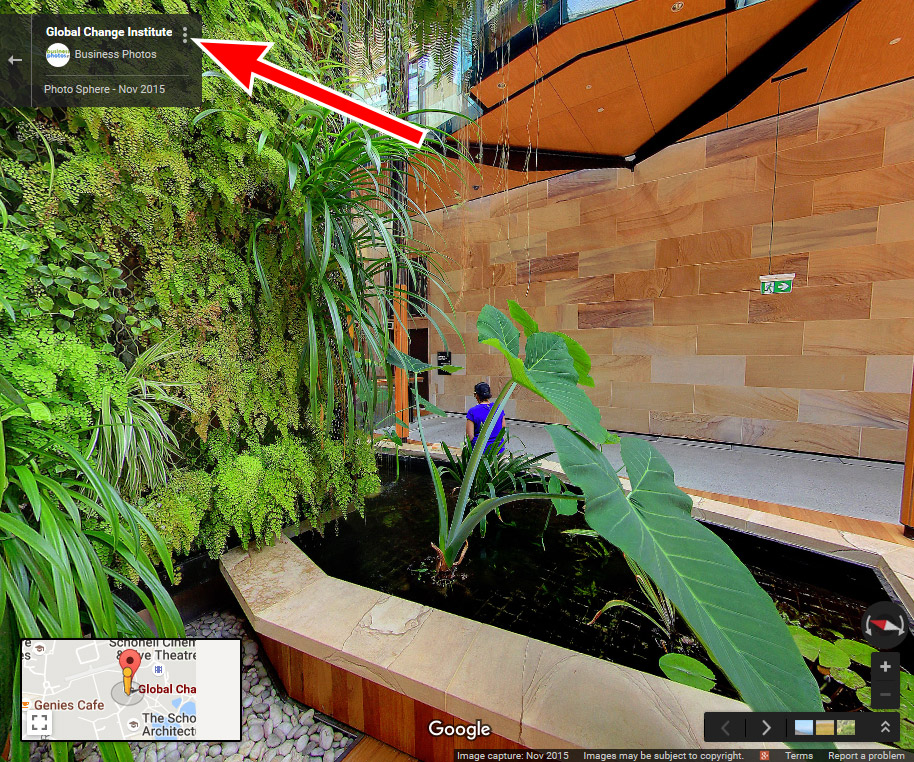
You can embed ANY view as the starting point of your Virtual Tour into your website. Navigate to the Area you want to use, change direction and zoom level until you get the view you want to use as the starting point in your website. The click on the 3 dots in the top left :

Step 3 – Get Embed Code
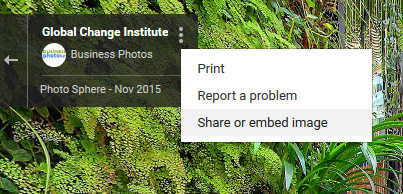
Select the “Share or embed image option”

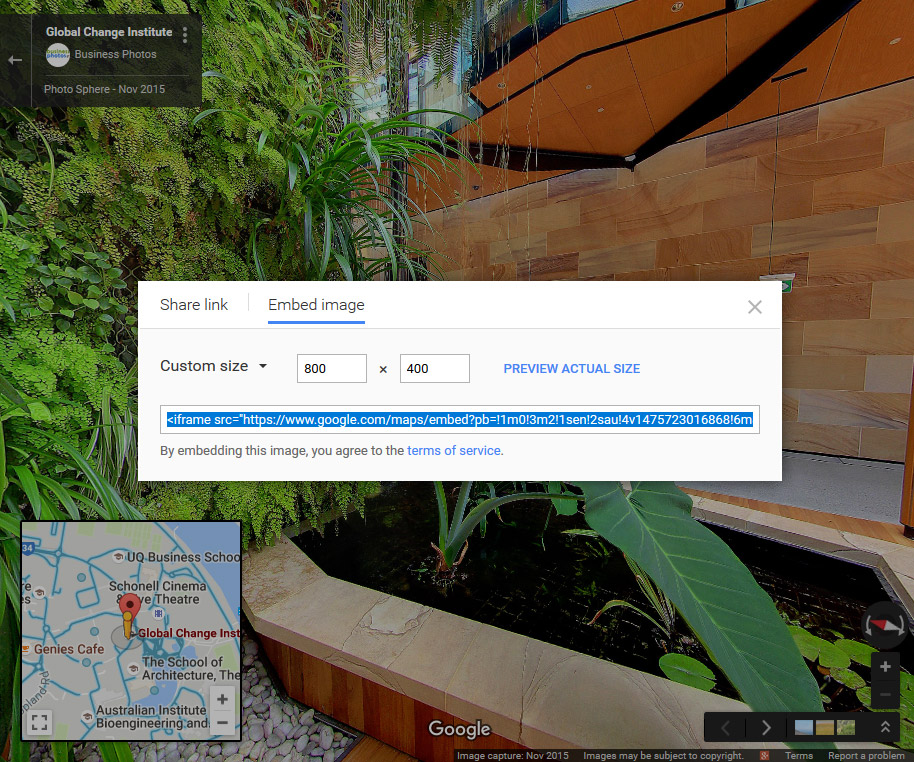
Select the “Embed Image” Tab and then choose the size you want to embedded view to be – Small (400×300), Medium (600×450) or Large (800×600)… You can also choose a Custom Size (as per the example below) and enter whatever dimensions that you want to use on your website.
Then select and copy (Ctrl C) the HTML embed code (it start with <iframe src and ends with </iframe>)

Step 4 – Add the Embed Code to your Website
Edit the page where you want to add the virtual tour into…and Paste the embed code into the html of the page on your website where you’d like your virtual tour to show The process will vary depending on how your website has been created (you may need to get advice from your web developer).
If you are using WordPress, make sure that you paste the code in “Text” mode not “Visual” mode or it will not work.
Step 5 – Save and Check the Page
Save the change and update the page (again thios process will depend on how your site is created). Then go to the page and your Virtual Tour should be embedded within your website.
